Tutorial Anki di Tejash Datta
tratto da https://medium.com/@tejashdatta/how-to-use-anki-66a22ed9b1a4 maggio 2020
How to Use Anki
暗記, or Anki, literally means memorization in Japanese. Anki can be considered as the Zeus of the pantheon of spaced repetition learning platforms. It’s more versatile than other platforms such as Memrise and Duolingo. Its high degree of customizability means that at first glance it can seem clunky and overwhelming. This beginner’s guide for using Anki will attempt to rectify that. I’ll teach you how to get started with the basics of using Anki.
Creating Content
In the first part of this guide, I’ll describe how to create or get flashcards in Anki.
Desktop Version
Anki is available on several platforms but the desktop version is the most complete and offers every feature. You can even extend its functionality through helpful add-ons.
Download & Install
Start by downloading the version that corresponds to your operating system (PC, Mac or Linux) from here. Then, install and run it.
Creating Your First Deck
A deck, just like in real life, is a collection of cards. We’ll be seeing how to make and add these cards shortly. The card and deck relation isn’t permanent. You can always change the deck that a card belongs to.
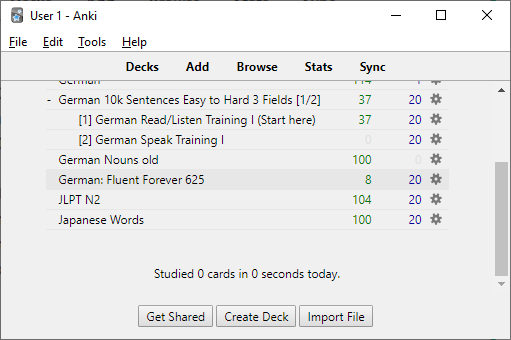
Click Create Deck and name it whatever you want. Eg. Japanese words.
Adding Notes
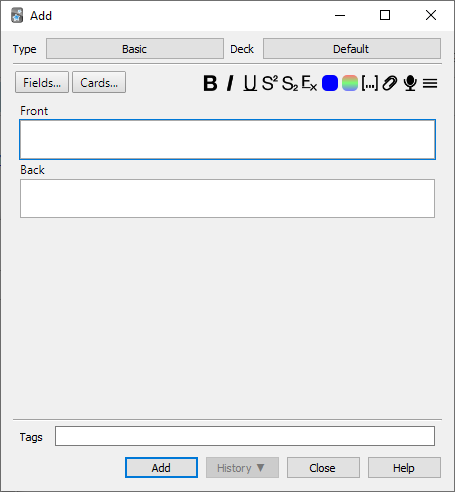
Click on Add at the top bar of the main window to start adding notes to your new deck.
As seen from the top, the note type is Basic and the deck it’s being added to is Default.
First, change the deck to the one we just created.
Next, we’ll change the note type, but to do that we’ll need to know exactly what a note is.
What is a Note?
A note in Anki is a unit that stores all the information regarding something. For example, a note for a particular word can hold information about its meaning, pronunciation, etc.
Changing Note Type
Click the button with Basic in it, next to Type.
Then click Manage below.
Then click Add on the right.
Select Add:Basic and click OK.
Name the note type something that describes the type of information it’s meant to contain. Eg. “Japanese Word”
Close the Manage dialogue box.
Finally, select your newly created note type and click Choose.
What is a Field?
Information in notes is organized into fields. In the case of the basic note above, there are just 2 fields: front and back. Simple, right? Why not just use that?
Using too few fields makes organization difficult. It’s best to have a field for each type of information you want to store in the note. Using the example of a vocabulary note again, you could have fields for the word itself, its definition, pronunciation, a related picture and an example sentence using the word.
This will be helpful when searching. You can restrict your query to a particular field. Eg. filtering for notes without any pictures.
Organizing by fields is also helpful for making cards from your notes, as we’ll soon see.
Adding Fields
To modify the fields for your custom note type, click the Fields button (below Type). Add whatever fields you want. Fields can be added or removed later as well.
The order of fields determines the order in which the fields will appear in the Add Note window and in the card browser. You can use the Tab key to jump from one field to the next. Thus, reposition the fields to be in an order that it’ll be easier and quicker to work with.


What Are Cards?
Cards are created from the fields present in a note. Multiple cards can be created from a single note.
Since we’ve already organized our notes into fields, we can select which fields to have on the front and reverse side of a card. For example, in the case of German vocabulary, it makes sense to have the audio field play on the front side of the card, as soon as the word is seen. Whereas for Japanese, it may make more sense to play the audio when the word’s reading is revealed on the reverse side of the card, in the answer.
Fields can even be excluded from cards. For example, you can choose to not use the definition field and rely on only the picture and example sentence of a word to learn it from your cards.
Creating Cards


Next to Fields, click Cards.
In the new window, click Add Field.
Select a field and whether to add it to front or back of the card.
Repeat this for every field required.
Reverse card: To create the reverse of the card you just made, click the Options button in the corner and select Add Card Type. This will create an exact copy of the card you just created. Click the Flip button to get the reverse of the first card we just made.
Back to Adding
That finishes up all the preparation that’s needed for setting up a new deck. Now you can head back to the Add window and start adding some notes.
Shared Decks
See the Get Shared next to Create Deck in the main window? Click it if you want to skip the hassle of creating your own cards and rely on decks shared with the community.
Installation is easy. Download a deck from the site and double click it to have it added. These decks can be further customised to your liking after importing them.


While shared decks are a fast and easy way to get high-quality content, I still urge you to customize them to suit your own personal style of learning since that’s what makes Anki more effective than other SRS platforms.
Synchronisation
Once you’re done adding notes or importing decks, click the Sync button in the top bar on the main screen. If you weren’t already prompted to log in or sign up when starting up Anki, you will be now. Your account on AnkiWeb is used to synchronize your cards and their associated media files (pictures and audio) across all your devices through cloud storage.
There’s no practical limit to the amount you’re allowed to upload, but I’d recommend not going overboard with large files such as high-resolution images since those will occupy a lot of space on your device after they’re downloaded and take more time to upload and download.
Learning on Mobile
This section of the guide is going to be much simpler. I’m going to explain helpful things about learning from the cards you just added.
Though you can view your cards on desktop as well, it’s more convenient and flexible to do so on your phone. You have the freedom to pull out your Anki deck whenever and wherever you want since cards are downloaded and can be accessed offline.
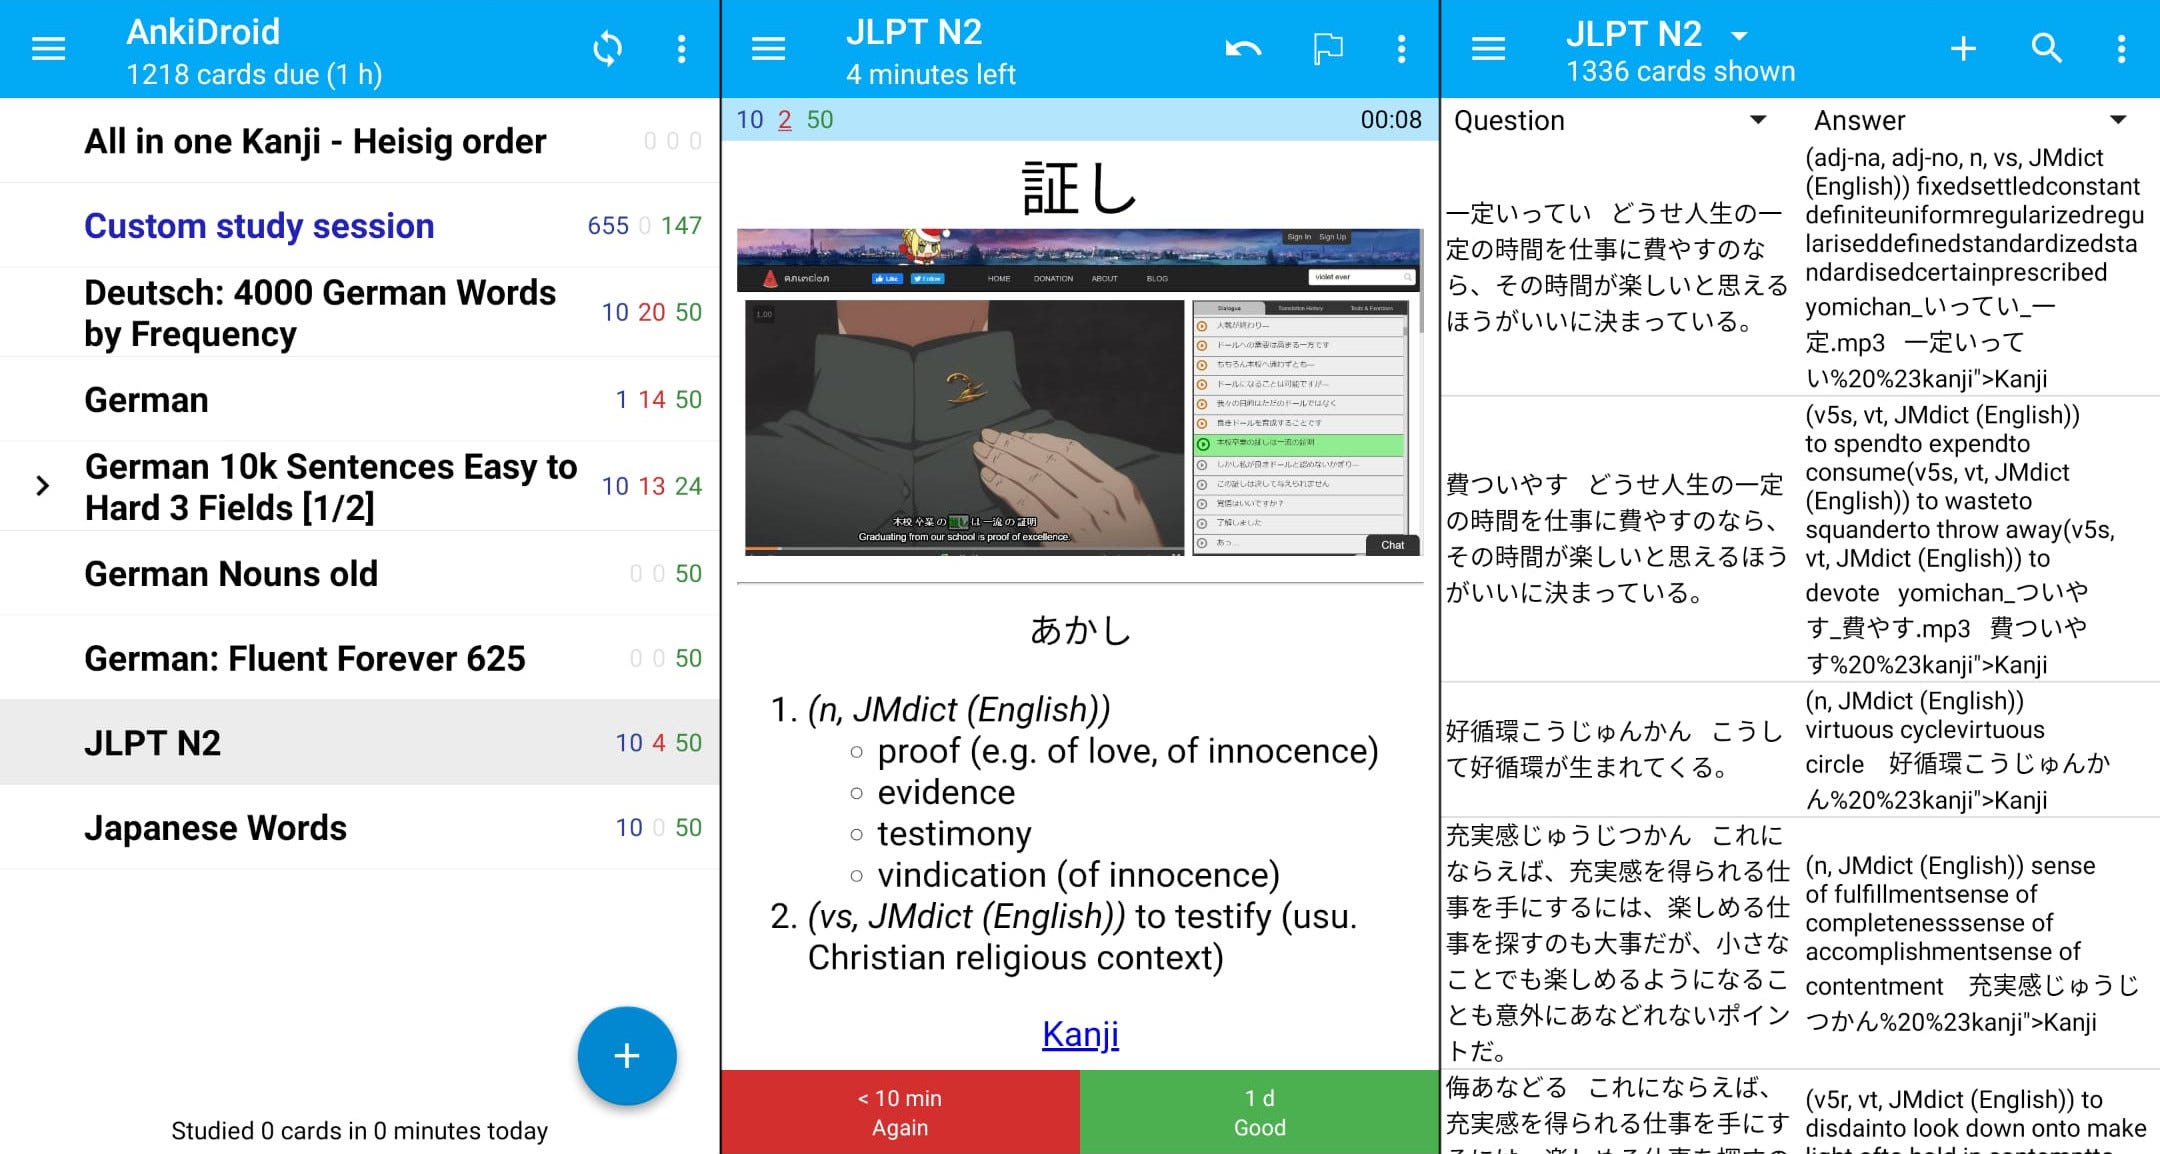
AnkiDroid
AnkiDroid is a free open-source Android app for using Anki. It’s more capable than you’d expect for a mobile companion app. Among other things, it allows you to import shared decks and to add, delete and modify notes. You can rely on just this app if you plan to use shared decks without any modifications.

AnkiMobile
AnkiMobile is the iOS counterpart of AnkiDroid. It’s ostensibly just as good, if not better than the Android version. However, I haven’t had the experience of using it myself so I can’t comment on its functionality.
Unlike the Android version, AnkiMobile is a paid app. The reason is mentioned on the site (under iPhone/Android in Download). No, it’s not because iOS users are more bourgeoisie.
Synchronisation
To get all cards you added, you’ll have to synchronise first. Click the circular sync icon in the top right corner and you’ll be prompted to sign in with your AnkiWeb account.
The AnkiDroid app doesn’t synchronise automatically when opening or closing the app in the same way that the desktop client does. This means you’ll need to remember to sync by clicking the icon to receive new cards you’ve added, or to update your progress.
How Many Cards a Day?
When deciding the number of cards to newly learn or revise in a day, the most important thing to keep in mind is consistency. Choose a pace that you’ll be able to sustain not just for the coming days, but for the coming weeks.
This also means you shouldn’t overburden yourself on any particular day to make up for missed days. Be as strict about not doing too much as you are about doing too little. Otherwise, you’ll find yourself making excuses like “I already studied so much yesterday, it’s alright if I take a break today” and before you know it, your habit of learning breaks.
Feel free to hasten or slacken your pace until you find your sweet spot. Learning new cards is always more mentally demanding than revising old ones.
Deck Options
You can change things like the number of cards to learn in a day from a deck’s options. To access it, long-press on the respective deck and click Options.
Custom Study
Using custom study, you can increase the number of cards you wish to study on a certain day. You can also set up other interesting custom study sessions which I encourage you to try out yourself. It’s accessed from the same long-press menu.
Review Options
This’ll be a brief overview of the non-trivial options that are available while learning cards. Click the ⋮ icon in the corner to view these.
Suspend Card
Use this option when you don’t want to see a card again. This doesn’t delete the card, it just ensures that the card won’t be shown to you when reviewing the deck. It can be unsuspended again from the card browser.
Bury Card
This option is used to defer a card until the next day. After using it on a card, it’ll be removed from the pile of cards you’re currently reviewing. It’ll be added back the following day.
Whiteboard
This feature is specifically designed for kanji learners. Use it to draw on the flashcard before revealing the answer.
Essential Tips
Database Changes
Some changes you make in Anki, such as adding a field to a note type, will prompt Anki to inform you that it’ll require “a full upload of the database.”


This difference in database happens whenever the local database (in your desktop application or mobile app) doesn’t match with the one on the cloud. Thus, you’ll have to merge the two by using one to overwrite the other. This means you’ll either have to download from the cloud or upload to it.
The important thing to note is that if you’re not careful, you could end up in a situation where you stand to lose some work or progress.
For example, you’ve just finished reviewing some cards on AnkiDroid but you don’t sync up after that. Then you sit down with Anki on your desktop, make some database altering change, and continue on with adding new cards. You sync your changes (Anki on desktop automatically does so when closing it) and upload to the database.
So far, so good. But the next time you open up AnkiDroid, you notice your newly added cards aren’t there. You go to sync and then you realise ya dun goofed. You’re presented with the choice of either downloading changes, which would overwrite and erase the progress you made through your deck. Or, you can choose to upload changes which will lead to the same conundrum when you sync from your desktop again and lose all the cards you made.


Don’t repeat my mistake. Always sync all your devices before making any database altering changes. This may as well be a PSA.
AnkiWeb
Besides the desktop and mobile app, Anki is also available right in the browser, in the form of AnkiWeb. It’s a stripped-down version of Anki that doesn’t let you do much more than the basics of reviewing cards. However, in a pinch, it’s more than enough to get the job done.
Conclusion
To be honest, using Anki seems like a lot of work for not much gain. Is Anki really worth the effort it takes to use? This guide is all but just the basics. We’ve only scratched the surface with what makes Anki so awesome. In future guides, I’ll be showing you pro-gamer moves you can pull off in Anki. You’ll come to learn and appreciate the customizability that makes it dominate over other platforms.
Japanese learners should also watch out for a future guide on how I make cards for learning Japanese vocabulary in Anki. It will feature Japanese specific tips.
Japanese learner (JLPT N2 in 1 year, 4 months). Web developer. Follow me on other platforms tejashdatta.github.io/social-media
Japanese learner (JLPT N2 in 1 year, 4 months). Web developer. Follow me on other platforms tejashdatta.github.io/social-media
There are mainly 2 ways I acquire vocabulary: through immersive exposure to a language; and through revising spaced repetition system (SRS) flashcards. In this post, I’ll explain why spaced repetition is the best way to learn vocabulary as a beginner.
To be honest, immersion is my preferred way of learning. Memorizing long lists of words without any actual context is about as fun as learning calculus (come @ me, math bros). However, as a complete beginner, there are a few reasons why you shouldn’t jump into immersion immediately. …
In this guide, I’ll introduce you to the site I used to optimize learning kanji through the approach outlined in Remembering the Kanji by James Heisig. (Read why it’s the fastest method to learn kanji here).
After the first few hundred kanji, Heisig leaves you to your own devices to come up with stories on your own. Using your imagination to learn kanji is pretty fun but there are times when you’ll have a hard time coming up with anything good. That’s the problem this site solves.
Kanji.koohii.com
This site streamlines Heisig’s method. Kanji are ordered the same way as in…
Learning kanji is often seen by beginners as the biggest roadblock towards learning Japanese. After all, Japanese people learn 2000+ characters over the course of 12 years of schooling. How is a foreign language learner supposed to compete?
In this guide, I’ll introduce you to the fastest and most efficient way of learning kanji. But before that, let’s briefly go over some common methods and discuss their strengths and limitations to see where they can be improved.
Not learning kanji immediately
In this approach, no separate effort is made to learn kanji at the beginning of your language journey. You simply learn new kanji…


Commenti
Posta un commento